How To Build A Dog Ear Fence? It is the question that pops up in the minds of dog owners wanting to make it themselves. A well-constructed fence serves multiple purposes: it enhances the aesthetics of your property, provides privacy, and keeps your beloved pets safe. Among the various styles of fences, the dog ear fence stands out for its simplicity, durability, and effectiveness.
In this guide, we will walk you through the step-by-step process of building a dog ear fence that not only adds to the charm of your home but also provides a secure environment for your furry friends.
How To Build A Dog Ear Fence.Materials You’ll Need
Table of Contents
ToggleBefore building your dog ear fence, gather all materials and tools. Here’s a list to get you started:
Materials:
- Pressure-treated wooden posts (4×4 inches)
- Wooden fence boards (1×6 inches)
- 2×4-inch lumber for rails
- Gravel or concrete mix
- Galvanized nails or screws
- Hinges and latch for the gate
- Post caps
- Wood preservative or stain
- Measuring tape
- Level
- Post hole digger
- Shovel
- Circular saw or miter saw
- Hammer or nail gun
- Screwdriver
- Safety equipment (gloves, goggles, etc.)
Step 1: Planning and Marking
Start by outlining the fenced area. Measure the perimeter where you want to install the dog ear fence. Use wooden stakes and string to mark the boundaries. Check local regulations and property lines before proceeding.
Step 2: Digging Post Holes
With the boundaries marked, begin digging post holes. The depth and spacing of the holes depend on the height of your fence and the soil conditions. Typically, holes should be around 24 to 36 inches deep and spaced 6 to 8 feet apart.
Step 3: Installing Posts
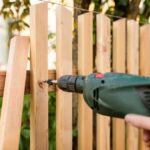
Place the pressure-treated wooden posts in the holes. Ensure they are level and plumb using a level. To provide stability, fill the holes with gravel or concrete mix, following the manufacturer’s instructions. Allow the concrete to set before proceeding.
Step 4: Attaching Rails
Once the posts are secure, attach horizontal 2×4-inch lumber as rails. These rails will support the fence boards. Position the bottom rail about 6 inches above the ground and the top rail just below the fence’s top edge. Use a level to make sure the rails are straight.
Step 5: Installing Fence Boards
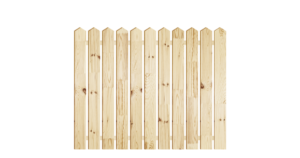
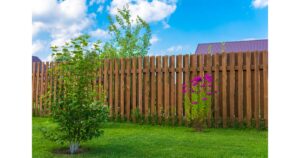
Now comes the distinctive feature of the dog ear fence – the fence boards. These boards are cut at an angle on the top to create the characteristic “dog ear” shape. Attach the fence boards vertically to the rails, leaving a small gap between each board for air circulation. The top of each board should align with the angle of the dog ear cut.
Step 6: Adding Gate
If your fence includes a gate, it’s time to install it. Attach hinges to the gate first, and then attach the hinges to the fence post. Ensure the gate swings freely and is level. Install a latch on the opposite side to keep the gate securely closed.
Step 7: Finishing Touches
To prolong the life of your dog’s ear fence, apply a wood preservative or stain. This will help protect the wood from the elements and keep it looking attractive for years. Additionally, consider adding post caps to the tops of the fence posts for a polished look.
Maintenance Tips
A well-maintained fence can last for decades. Here are some tips to keep your dog ear fence in top condition:
- Regular Inspections: Periodically check for loose boards, damaged posts, and signs of wear. Address any issues promptly to prevent further damage.
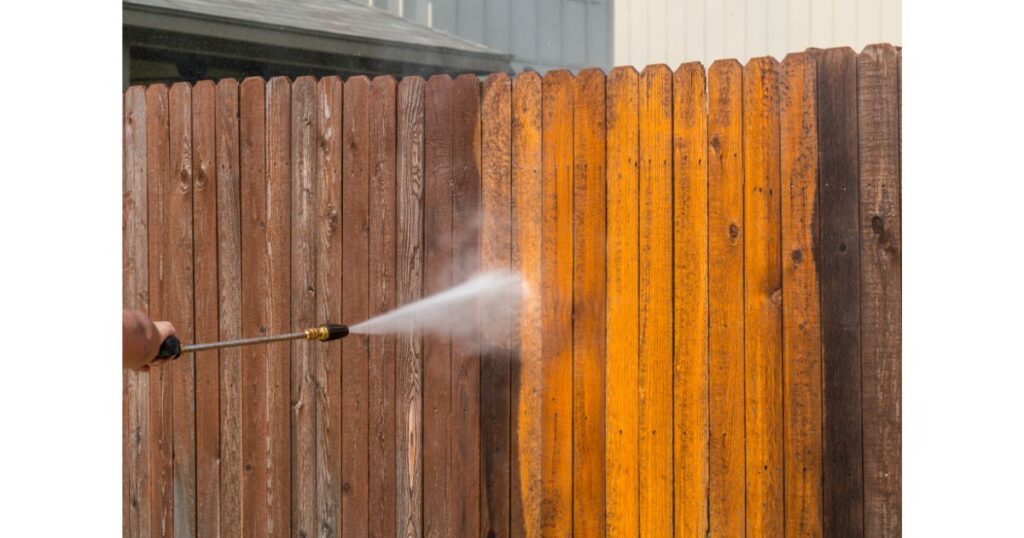
- Cleaning: Clean the fence boards and posts annually to remove dirt, mold, and mildew. A simple mixture of water and mild detergent can work wonders.
- Repairs: Replace any warped or cracked boards as needed. Secure loose nails or screws promptly to maintain the fence’s integrity.
- Wood Treatment: Depending on the climate in your area, consider reapplying a wood preservative or stain every few years to protect the wood from moisture and UV rays.
- Trim Vegetation: Trim back any bushes, vines, or trees that come in contact with the fence. This prevents moisture buildup and reduces the risk of wood decay.
Conclusion
Building a dog ear fence can be a rewarding DIY project that not only adds value to your property but also ensures the safety of your pets. With careful planning, proper materials, and attention to detail, you can create a sturdy and aesthetically pleasing fence that stands the test of time. Remember to prioritize regular maintenance to keep your dog ear fence looking great and functioning effectively for years to come.
FAQs And Answers
What are dog ears on a fence?
“Dog ears” on a fence refer to a specific style of fence design or a type of fence picket that is commonly used in the United States. This style is characterized by the top of each fence picket having a flat, squared-off shape with two pointed corners resembling a dog’s ears. These pointed corners typically extend beyond the top horizontal rail of the fence, giving it a distinctive appearance.
The term “dog ears” is used because the pointed corners resemble the ears of a dog. This style is often seen in traditional wooden fences and is known for its simplicity and classic look. It is frequently used for privacy fences, picket fences, and other types of residential fencing. Dog ear fences are popular for their aesthetic appeal and durability, making them a common choice for homeowners in many regions of the United States.
What is the difference between a flat top and a dog ear fence?
Flat top and dog ear fences are two distinct styles of wooden fences, each with its own appearance and characteristics. Here are the main differences between the two:
- Top Design:
- Flat Top Fence: A flat top fence features pickets that have a straight, horizontal top. The pickets do not have any pointed or decorative elements, creating a clean and flat appearance along the top of the fence.
- Dog Ear Fence: A dog ear fence, on the other hand, has pickets with a flat top that has two pointed corners resembling a dog’s ears. These pointed corners give the fence a more rustic and traditional look.
- Aesthetic Appeal:
- Flat Top Fence: Flat top fences tend to have a more contemporary and modern appearance due to their straight and simple lines.
- Dog Ear Fence: Dog ear fences are known for their classic and timeless look, often evoking a more traditional or rustic feel.
- Versatility:
- Flat Top Fence: Flat-top fences can be a versatile choice for various fence styles, including privacy fences, picket fences, and ranch-style fences. They can blend well with different architectural styles.
- Dog Ear Fence: Dog ear fences are typically associated with traditional and residential settings. They are often chosen for their classic appearance in suburban or rural areas.
- Maintenance:
- Maintenance requirements for both flat top and dog ear fences are relatively similar. Regular maintenance, such as staining or sealing the wood, is necessary to protect the fence from weathering, rot, and decay.
In summary, the primary difference between flat top and dog ear fences is the design of the picket tops. Flat-top fences have straight, horizontal tops, while dog ear fences feature pickets with two pointed corners resembling a dog’s ears. The choice between the two styles often depends on personal preference and the desired aesthetic for the property.
How long does a dog ear fence last?
The lifespan of a dog ear fence can vary significantly depending on several factors, including the type of wood used, maintenance, climate, and environmental conditions. On average, a well-maintained dog ear fence can last anywhere from 15 to 20 years or even longer. Here are some factors that can affect the longevity of a dog ear fence:
- Wood Type: The type of wood used for the fence plays a crucial role in its lifespan. Common choices for dog ear fences include cedar and pressure-treated pine. Cedar is naturally resistant to decay and insects, making it a durable option. Pressure-treated pine is treated with chemicals to resist rot and insects and can also be long-lasting.
- Maintenance: Regular maintenance is essential to prolong the life of a dog ear fence. This includes staining or sealing the wood to protect it from moisture, UV rays, and other environmental factors. Without proper maintenance, the fence may deteriorate more quickly.
- Climate: The climate in your area can significantly impact the lifespan of a fence. Fences in regions with harsh weather conditions, such as extreme heat, cold, or heavy rainfall, may require more frequent maintenance and may not last as long as fences in milder climates.
- Ground Conditions: The type of soil and ground conditions around the fence can affect its durability. Fences in areas with well-draining soil and proper drainage are less likely to experience rot and decay at the base.
- Insect and Pest Activity: Insect infestations, such as termites or carpenter ants, can damage wooden fences. Using insect-resistant wood or applying appropriate treatments can help mitigate this risk.
- Quality of Construction: The quality of the fence’s construction, including the use of proper fasteners and installation techniques, can affect its longevity. A well-built fence is more likely to withstand the test of time.
To maximize the lifespan of your dog ear fence, it’s essential to choose high-quality materials, perform regular maintenance, and address any issues promptly. If properly cared for, a dog ear fence can provide privacy and enhance the appearance of your property for many years.


