How To Build a Dog Fence? Building a dog fence is a significant undertaking that requires careful planning, precise execution, and a commitment to creating a safe and secure outdoor space for your beloved canine companion. In this comprehensive guide, we’ll delve deeper into each step of building a dog fence, providing with detailed instructions and additional tips to ensure your project’s success.
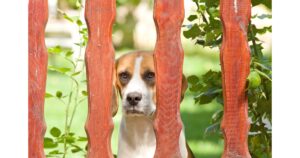
How To Build Dog Fence. Selecting the Right Location
Table of Contents
ToggleThe location of your dog fence is the cornerstone of a successful project. Here, we’ll explore various considerations to help you make an informed decision:
Size and Activity Level of Your Dog
Understanding your dog’s size and activity level is paramount when determining the size of the enclosure. Different breeds have different exercise needs, and some are more active than others.
Active Breeds: If you have an active breed like a Border Collie or a Labrador Retriever, they will need more space to run and play freely. A larger enclosure is essential to accommodate their boundless energy and keep them happy.
Smaller or Less Active Breeds: Smaller or less active breeds may require a smaller enclosure. However, it’s crucial to ensure that even smaller dogs have enough room to move around comfortably.
Visibility and Accessibility
The visibility and accessibility of the chosen area are crucial for both you and your pet. Consider the following:
Clear View: Ensure that the location offers a clear line of sight for you to keep an eye on your dog while they enjoy their outdoor space. This visibility will allow you to monitor their safety and well-being.
Easy Access: Evaluate how easy it is for you and your pet to access the chosen area. Convenience matters when it comes to daily walks and playtime. A location that is easily accessible from your home is ideal.
Sun and Shade
Dogs, like humans, need a mix of sun and shade to stay comfortable and healthy. Take the following into account:
Sun Exposure: Consider the amount of sun exposure the area receives throughout the day. Some dogs enjoy basking in the sun, while others may be prone to overheating. Ensure that there are shaded areas within the enclosure for your pet to retreat to when needed.
Weather Variability: Think about how the location fares in different weather conditions. Is it excessively windy, rainy, or prone to extreme temperatures? Providing shelter within the enclosure can protect your dog from the elements.
Check Local Regulations
Before you start digging post holes and assembling panels, it’s essential to be aware of and adhere to local regulations and zoning laws. Here’s what you need to know:
Height Restrictions
Many areas have height restrictions for fences, which are typically set by local ordinances. The height limit can vary significantly from one place to another. To avoid compliance issues, make sure your planned fence height aligns with your local regulations.
Property Lines
Understanding your property lines is crucial to avoid disputes with neighbors. You don’t want to accidentally encroach on their property with your fence. Survey your property or consult your property survey documents to confirm your boundaries.
Permits
Some areas require permits for fence construction, especially if the fence is over a certain height or if there are specific regulations in place. Contact your local municipality or building department to inquire about the need for permits and the application process.
By thoroughly considering these factors and complying with local regulations, you can lay a strong foundation for your dog fence project. Planning will help ensure a successful outcome and provide your furry friend with a safe and enjoyable outdoor space to call their own.
How To Build Dog Fence. Tailoring Design to Your Needs
In the world of dog fence planning and construction, understanding the primary purpose of your enclosure is akin to having a blueprint for your project. It guides your decisions, shapes the design, and ultimately determines how well the fence serves both you and your furry companion. Let’s explore the three primary purposes of a dog fence and how they can influence your design choices.
Containment: Keeping Your Dog Safe and Sound
Containment is often the primary purpose of a dog fence, especially for pet owners who want to ensure their furry friend stays safely within a defined area. Here are some key considerations for creating an effective containment-focused dog fence:
Traditional Fence Design
For containment purposes, a traditional fence design is usually the go-to choice. This design typically consists of solid materials, such as wood, vinyl, or metal, that form a continuous barrier around the perimeter. It creates a physical boundary that prevents your dog from wandering off your property.
Secure Enclosure
Make sure the fence is secure from top to bottom. Check for any gaps or weaknesses that your dog could exploit to escape. It’s essential to choose materials that are sturdy and difficult for your dog to damage or breach.
Security: Going the Extra Mile
Security is a crucial consideration for dog owners who want not only to contain their pets but also to enhance their safety and protection. Here’s how you can incorporate security features into your dog fence:
Lockable Gates
Installing lockable gates adds an extra layer of security to your dog fence. These gates can be locked when needed, ensuring that unauthorized individuals, including strangers or wildlife, can’t access your pet’s outdoor space.
Integrated Cameras
In the age of technology, integrating security cameras into your dog fence can provide peace of mind. These cameras allow you to monitor your pet remotely and keep an eye on the surrounding area. It’s especially beneficial if you live in an area with potential threats or concerns.
Privacy: Creating a Secluded Oasis
Privacy is often an underrated but essential aspect of a dog fence, particularly if you want to create a serene and secluded outdoor space for your pet. Here’s how you can achieve privacy within your dog enclosure:
Selecting Appropriate Materials
Choosing the right materials is key to creating a private space. Solid materials, such as wooden panels or vinyl, can offer privacy by blocking the view from the outside. Opt for designs that minimize gaps between panels for maximum seclusion.
Landscape Enhancements
Landscaping can play a significant role in enhancing privacy. Planting tall shrubs, bushes, or trees along the perimeter of the fence can create a natural barrier and add a lush, green backdrop to your pet’s outdoor haven.
By understanding and defining the primary purpose of your dog fence—whether it’s containment, security, or privacy—you can tailor the design and features to meet your specific needs and the needs of your furry friend. A well-designed dog fence not only serves its intended purpose but also enhances the safety, security, and enjoyment of outdoor time for your pet.
How To Build Dog Fence.Choosing the Right Materials
The materials you select for your dog fence can significantly impact its durability, functionality, and overall aesthetic appeal. In this section, we’ll delve deeper into the three primary options—wooden fences, chain-link fences, and vinyl fences—and help you make an informed choice that aligns with your specific needs and preferences.
2.1 Wood, Chain Link, or Vinyl?
Wooden Fences: A Timeless Classic
Wooden fences have long been favored for their classic and aesthetically pleasing look. They offer a warm and natural appearance that can blend seamlessly with various architectural styles. Here are some key attributes and considerations:
- Customizability: Wooden fences are highly customizable. You can choose from various wood types, such as cedar, redwood, or pine, each offering its unique character and durability.
- Staining and Painting: Wooden fences can be stained or painted to match your home’s exterior or create a specific ambiance in your outdoor space. This versatility allows you to achieve the desired aesthetic.
- Maintenance: Wooden fences require regular maintenance, including staining or painting every few years to protect the wood from moisture and UV damage. Additionally, you should inspect for rot and replace any damaged boards promptly.
Chain-Link Fences: Durability and Visibility
Chain-link fences are known for their durability and visibility. They provide a clear view of both your property and the surrounding area. Here’s what you need to know about them:
- Durability: Chain-link fences are highly durable and can withstand various weather conditions. They are resistant to rust and corrosion, making them a long-lasting option.
- Visibility: The open design of chain-link fences offers excellent visibility, allowing you to keep an eye on your pet and your surroundings. This can be advantageous if safety and surveillance are top priorities.
- Privacy: It’s important to note that chain-link fences do not provide the same level of privacy as other materials. If privacy is a significant concern, you may need to explore additional options, such as adding privacy slats or choosing a different material.
Vinyl Fences: Low-Maintenance Elegance
Vinyl fences are known for their low-maintenance qualities and come in a variety of styles and colors. Consider these key features:
- Low Maintenance: Vinyl fences are virtually maintenance-free. They are resistant to rot, insects, and weather conditions, eliminating the need for staining, painting, or regular upkeep.
- Versatility: Vinyl fences are available in various styles, including picket, privacy, and ranch rail designs. They also come in different colors, allowing you to match the fence to your home’s exterior or personal preferences.
- Durability: Vinyl fences are built to last. They are resistant to fading, cracking, and peeling, ensuring that your fence remains in excellent condition for years to come.
Ultimately, the choice between wooden, chain-link, and vinyl fences depends on your specific requirements, budget, and aesthetic preferences. Each material offers its unique advantages, and your decision should align with your primary goals for the dog fence. Whether you prioritize a classic look, durability, visibility, or low maintenance, the right material choice will set the foundation for a successful dog fence project.
How To Build Dog Fence. Gathering Essential Tools and Materials
Building a dog fence is a rewarding project that requires careful planning and precise execution. To ensure the construction process goes smoothly and efficiently, it’s crucial to gather all the necessary tools and materials before you start. In this section, we’ll provide you with a comprehensive list of essential tools and materials, guiding you through the process of building your dog fence.
Tools You’ll Need
- Post-Hole Digger: A post-hole digger is an essential tool for creating holes in the ground where your fence posts will be installed. It comes in manual and powered varieties, and your choice depends on the scale of your project.
- Level: A level is used to ensure that your fence posts, rails, and panels are installed perfectly straight and level. This tool is essential for maintaining the structural integrity and appearance of your fence.
- Saw: Depending on your chosen fence design and materials, you may need a saw to cut fence panels or rails to the desired length. A circular saw or handsaw can be useful for this purpose.
- Screwdriver: A screwdriver is necessary for attaching fasteners and securing various components of the fence. It’s recommended to have both flathead and Phillips-head screwdrivers on hand.
- Hammer: A hammer is versatile and can be used for driving nails, securing fasteners, and making minor adjustments during the construction process.
- Nails or Screws: Depending on your fence material and design, you’ll need an appropriate quantity of nails or screws to secure fence panels, rails, and other components. Choose the right type and size for the job.
- Measuring Tape: Accurate measurements are crucial in ensuring that your fence components are properly spaced and aligned. A measuring tape helps you maintain precision throughout the construction process.
Materials You’ll Need
- Fence Posts: Fence posts are the vertical supports that anchor your fence into the ground. The number of posts you’ll need depends on the size and design of your fence. Make sure the posts are sturdy and long enough to provide adequate support.
- Rails: Rails are horizontal components that connect the fence posts and provide structural support for the fence panels. The number and length of rails will vary depending on your chosen fence design.
- Fence Panels: Fence panels make up the visible portion of your fence. They come in various styles and materials, such as wood, vinyl, or metal. Choose panels that align with your design and functional preferences.
- Fasteners: Fasteners, such as nails, screws, or bolts, are used to secure fence panels and rails to the posts. Ensure that the fasteners you choose are suitable for the materials you’re working with.
- Gate (if applicable): If your fence design includes a gate for entry and exit, make sure you have the gate components, including hinges, latches, and a gate frame. Gates should be appropriately sized and aligned within the fence.
Process of Making DIY Fence
Preparing a DIY dog fence involves several essential steps, from setting the posts to attaching the panels and ensuring the fence is secure and functional. Here’s a step-by-step guide to help you construct your dog fence using the tools and materials mentioned earlier:
Step 1: Planning and Marking
Before you start digging holes and assembling components, it’s crucial to have a clear plan in place. Mark the boundaries where your fence will be installed, ensuring you’ve considered factors like property lines, local regulations, and the desired size of the enclosure. Measure and mark the locations for your fence posts, ensuring they are evenly spaced.
Step 2: Digging Post Holes
Use a post-hole digger to dig holes for your fence posts. The depth and diameter of the holes will depend on the type of soil and the height of your fence. As a general guideline, holes should be about one-third the height of the fence post. Ensure that the holes are evenly spaced and aligned with your markings.
Step 3: Setting the Fence Posts
Place the fence posts into the holes you’ve dug. Use a level to ensure they are plumb (perfectly vertical) and level (perfectly horizontal). Fill the holes with concrete or gravel to secure the posts in place. Allow the concrete to set according to the manufacturer’s instructions. Double-check that the posts are still plumb and level as the concrete sets.
Step 4: Attaching Horizontal Rails
Once the posts are securely in place, it’s time to attach the horizontal rails. Position the rails horizontally between the posts, ensuring they are level and evenly spaced. Depending on your fence design, you may have both top and bottom rails. Attach the rails using appropriate fasteners, such as screws or nails, making sure they are secure.
Step 5: Attaching Fence Panels
With the rails in place, it’s time to attach the fence panels. Align the panels with the rails and posts, ensuring that they fit snugly. Depending on your chosen design, you may need to trim panels to fit the desired length. Secure the panels to the rails and posts using screws, nails, or the recommended fasteners for your specific material.
Step 6: Gate Installation (if applicable)
If your fence design includes a gate, install it according to the manufacturer’s instructions. Make sure the gate is level and swings smoothly. Attach hinges to one of the fence posts and the gate frame, and install a latch or lock mechanism for security.
Step 7: Inspecting and Securing
After completing the construction, conduct a thorough inspection of your DIY dog fence. Check for any sharp edges, protruding nails, or areas that may pose a safety hazard to your pet. Make any necessary adjustments or additions to ensure the fence is secure and safe.
Step 8: Adding Finishing Touches (if desired)
If you’ve chosen a wooden fence, consider painting or staining it to protect the wood and enhance its appearance. Use pet-friendly, non-toxic finishes. Additionally, you can landscape around the fence to enhance its visual appeal and provide your pet with a pleasant environment.
Step 9: Regular Maintenance
To ensure the longevity and performance of your DIY dog fence, perform regular maintenance. Periodically inspect the fence for any damage or wear and tear. Address any issues promptly to maintain its integrity. Clean the fence regularly to remove dirt, debris, and any potential hazards.
By following these steps and utilizing the tools and materials mentioned earlier, you can successfully prepare and construct your DIY dog fence. Proper planning, precise execution, and regular maintenance will result in a secure and enjoyable outdoor space for your beloved canine companion.
Conclusion:
In the journey of constructing your DIY dog fence, you’ve embarked on a mission to provide your furry friend with a safe, secure, and enjoyable outdoor haven. Your dedication to this project reflects your commitment to your pet’s well-being and happiness.
Throughout the process, you’ve carefully planned, measured, and assembled each component with the utmost precision. The selection of the right tools and materials, along with adherence to local regulations, has been the cornerstone of your success. You’ve watched as your fence posts firmly anchored into the ground, your rails provided structure and stability, and your fence panels created a visible boundary that assures both you and your pet.
